How to Add Categories Using Schoolizer?

Are you looking for a quick and efficient tool to help you organize your classes? Schoolizer got you covered! With Schoolizer, you can easily create and customize categories to ensure that your content is well-structured and easily accessible.
In this tutorial, we will guide you through the process of adding categories, helping you enhance the organization and user experience of your website or application.
What’s the importance of adding categories using Schoolizer?
Adding categories using Schoolizer is essential for both students and teachers, here are some advantages to this function:
- Categories help you organize your content in a logical and structured manner. By creating different categories, you can group related articles or topics together.
- When you have clear and organized categories, it becomes easy for users to navigate through your content and find what they need quickly.
- Using categories, you can improve the searchability of your website or application. Users can use categories as search criteria to find relevant content.
- You can use categories to customize access to your content. You can assign different permissions to each category, allowing you to control who can access specific content.
- When you have clear categories, you can better organize the editorial process and content management.
- You can easily find articles or topics based on the specified categories and edit or update them accordingly.
Step 1: Log in to Schoolizer

1- Open your web browser and go to the Schoolizer website at https://schoolizer.com
2- Click on the "Start Now" button to register.
3- Enter your username and password to log in to your Schoolizer account.
4- To activate your account, go to your email and check the spam messages.
5- Press the auto-activation button found in the Schoolizer email to activate your account.
6- Change the provided password to make it your own and log in.
Step 2: Accessing the Categories Page
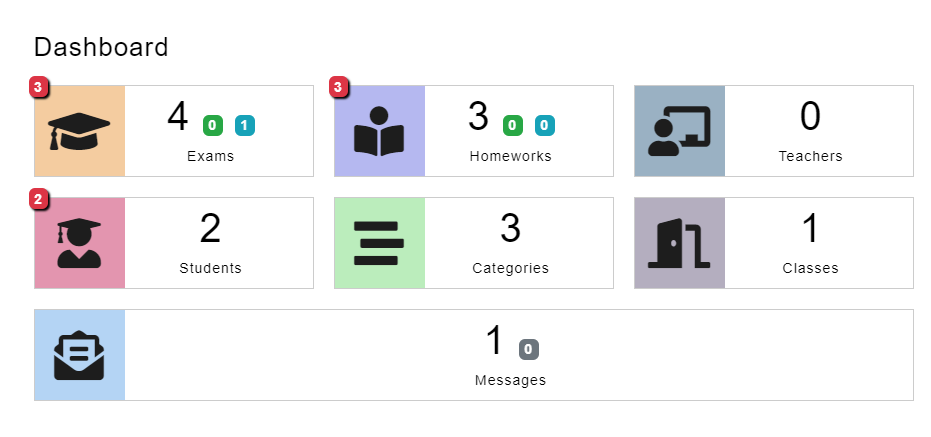
1- Once logged in, you’ll access the main dashboard where you can choose the function you need.
2- Navigate to the "Categories" page by clicking on the "Categories" tab in the main menu.
Step 3: Adding a New Category
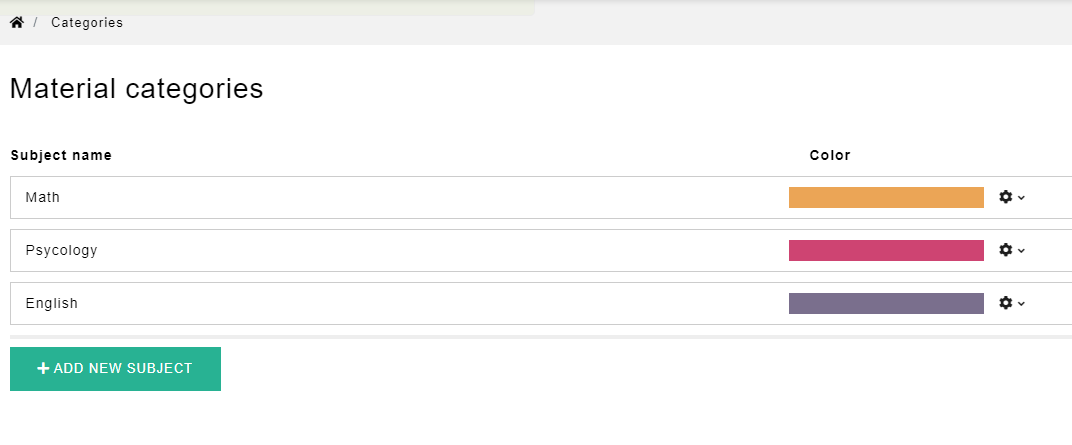
1- On the Categories page, you will see a button labeled "Add New Subject." Click on it to create a new category.
2- A form will appear where you can enter the details of the category.
3- Start by giving your category a name. Choose a descriptive name that accurately represents the content it will contain.
4- Next, you can choose a color for each category, thus making your categories color-coordinated.
5- Once you have filled in all the necessary information, click the "Save" button to create the category.
Step 4: Editing Categories

1- To edit an existing category, go back to the Categories page and locate the category you want to modify.
2- Look for the Settings symbol next to the category. Click on it to access the editing options.
3- Make the desired changes to the category's name, description, or any other settings.
4- After making the necessary edits, remember to save your changes by clicking the "Save" or "Update" button.
Tips for Adding Categories with Schoolizer
1- When adding categories, consider organizing them in a logical and intuitive manner. This will make it easier for users to navigate and find the information they need.
2- Use clear and concise names for your categories to ensure they accurately represent the content they contain.
3- Regularly review and update your categories as needed. Over time, you may find that certain categories become obsolete or need to be reorganized.
In Conclusion
Congratulations! You have now completed our step-by-step tutorial on adding categories using Schoolizer. You have gained the knowledge and skills necessary to organize and categorize your content in a structured and efficient manner.
By utilizing categories, you can improve the user experience, make content easily searchable, and customize access to different types of content. Take advantage of the features offered by Schoolizer to further enhance your content management experience.
If you have any questions or additional needs, feel free to reach out. We are here to assist you!
Related articles


