How to Schedule Classes Using Schoolizer?

Schoolizer is a user-friendly platform that allows you to easily schedule and manage your classes. In this tutorial, we will guide you through the process of scheduling classes step by step using Schoolizer for fun and effective teaching.
What Does Adding a Class Mean?
Adding a class with Schoolizer refers to the process of including a specific course or subject in your Schoolizer account. It allows you to input relevant information about the class, such as the class name, grade level, subject, and any additional details.
By adding a class, you can effectively organize your academic schedule and access various features and benefits provided by Schoolizer.
Here are some reasons why you should consider using Schoolizer to add classes:
- Maintain a well-structured and organized academic schedule. By adding classes, you can have a clear overview of your courses, their timings, and any important details associated with them.
- By adding your classes, you can easily see the time slots allocated for each course, allowing you to allocate time for studying, extracurricular activities, and other commitments.
- Schoolizer often provides features that allow you to set up notifications and reminders for your classes to ensure that you don't miss any important deadlines, assignments, or upcoming exams.
- By adding your classes, you can access these features and engage in discussions, share resources, and ask questions related to the class.
- You can utilize these features to monitor your academic performance, track grades, submit assignments, and analyze your progress over time.
Step 1: Log in to Schoolizer

1- Open your web browser and go to the Schoolizer website at https://schoolizer.com
2- Click on the "Start Now" button to log in.
3- Enter your username and password to log in to your Schoolizer account.
4- To activate your account, go to your email and check the spam messages.
5- Press the auto-activation button found in the Schoolizer email to activate your account.
6- Change the provided password to make it your own and log in.
Step 2: Accessing the Classes Dashboard

1- Once you log in, you will be redirected to the Schoolizer dashboard.
2- Locate the "Classes" tab in the main navigation menu and click on it.
Step 3: Adding a New Class
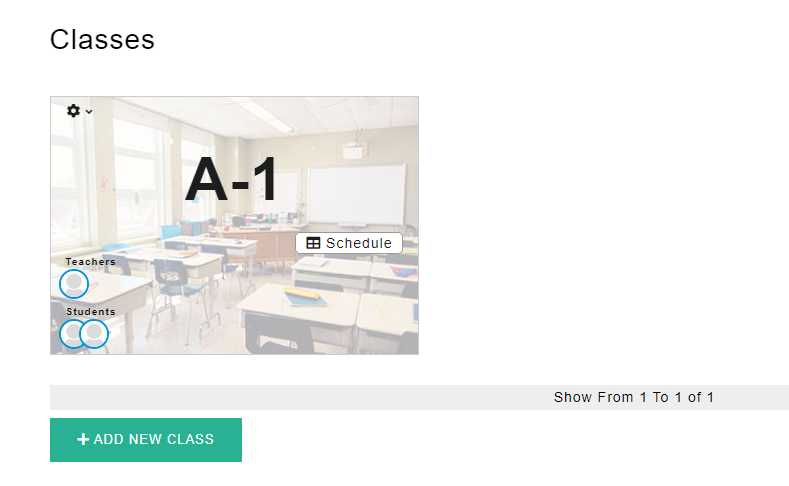
1- On the Classes dashboard, you will see a list of your existing classes (if any).
2- To add a new class, click on the "Add New Class" button, usually at the page's bottom left corner.
Step 4: Class Details
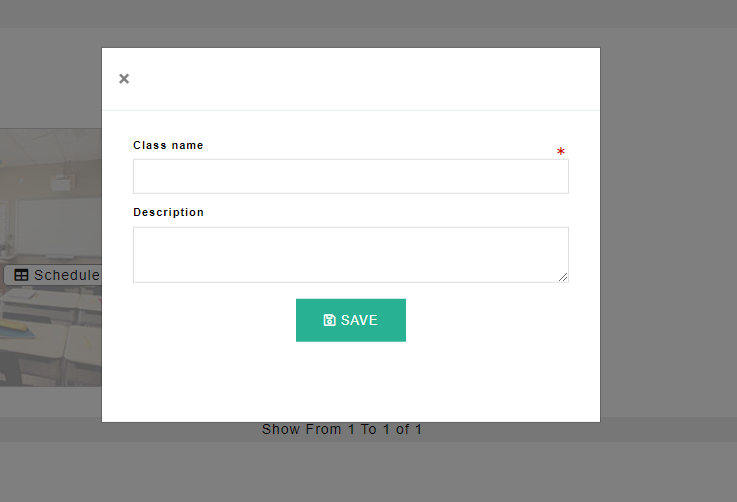
1- In the "Add New Class" form, you will be prompted to enter the class name and description.
2- Choose a descriptive name for your class that will help students easily identify it (Science, Math, English, etc)
3- Provide a brief class description, including any important details or prerequisites.
Step 5: Save Your Class and Start Teaching
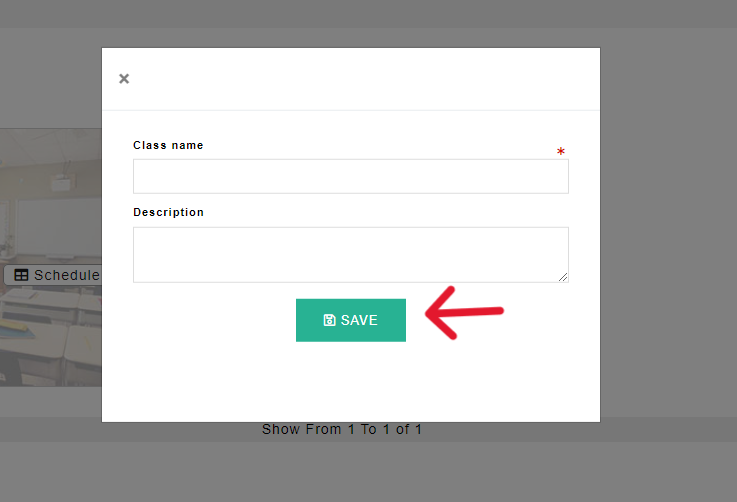
1- Once you have entered the class name and description, click on the "Save" button to save your class.
2- Congratulations! You have successfully scheduled a new class using Schoolizer.
3- To start teaching, you can now share the class details with your students and begin conducting your lessons.
In Conclusion
Scheduling classes using Schoolizer is a straightforward process that allows you to manage your teaching schedule efficiently.
By following the steps outlined in this tutorial, you can easily create and schedule classes, ensuring a smooth and organized learning experience for both you and your students.
Related articles


