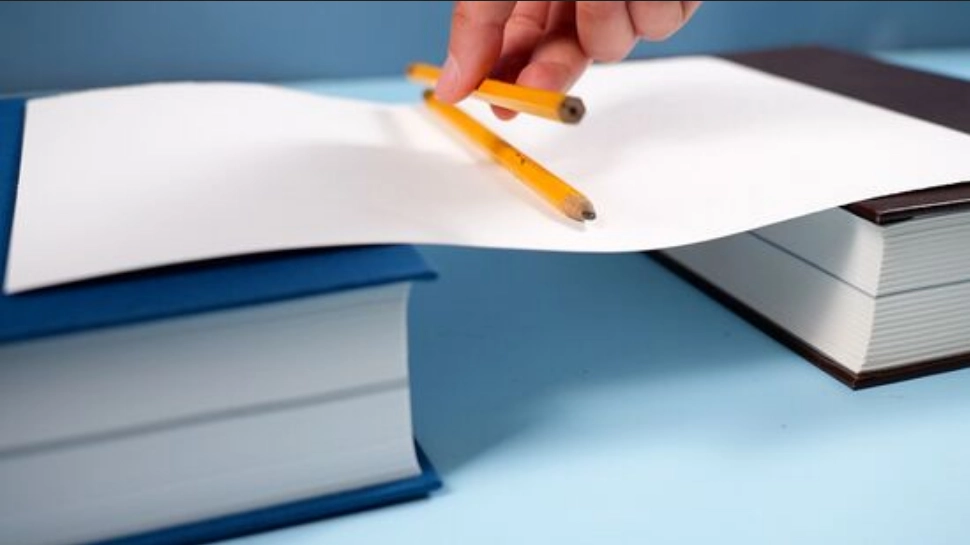
This paper bridge experiment turns a familiar sheet of paper into a small engineering investigation. Students predict, build, test and revise a bridge that spans the same gap each time. The aim is not to crown one “best” design after a single trial. Learners compare evidence, notice how shape affects bending and explain what they would change next. The lesson can run in one class period with ordinary materials, then extend into a short data or design-writing task.
Learning goals
- Plan a fair comparison by changing the bridge shape while keeping the gap, paper size and loading method consistent.
- Record observations in a table and use evidence to support a design claim.
- Use words such as span, load, bend, support and structure accurately.
- Improve a design after a test rather than treating a first attempt as final.
Materials for each group
- Three sheets of the same printer paper
- Two stable books or boxes of equal height
- A ruler and a flat tray or paper cup for holding small weights
- Identical counters, washers or large coins to add one at a time
- A recording sheet and pencil
Use small, non-sharp weights and keep the test low over a desk. The teacher should place supports securely and supervise loading. Do not use heavy objects or allow students to put their faces or hands beneath a loaded bridge. If counters are a choking hazard for the age group, choose larger classroom-safe blocks and supervise closely.
Set up a fair test
Place the supports parallel with a measured 15-centimetre gap. Mark the centre line. Use sheets cut to the same size. Decide what counts as “held”: for example, the bridge supports each weight for five seconds without touching the desk. The exact rule matters less than using the same rule for every design. Ask students to predict which shape will bend least and explain why before testing.
Build and test three designs
- Flat sheet: Lay one sheet across the gap with no folds. Add one counter at a time near the centre until the paper bends to the class stopping rule. Record the count; reset the supports before the next trial.
- Folded sides: Fold two narrow edges upward to make a shallow channel. Keep the same span and loading position. Add the same kind of counters one by one and record the result.
- Accordion folds: Fold the third sheet into repeated ridges running along the bridge. Keep the ridges facing upward, the support gap unchanged and the counter position centred. Test and record.
These designs are examples, not guaranteed winners. Paper thickness, fold quality, support placement and loading can change the result. If a bridge slips, stop and reset rather than counting it as a structural failure.
Student recording table
| Design | Prediction | Weights held | What changed or bent? | Evidence-based explanation |
|---|---|---|---|---|
| Flat | ||||
| Folded sides | ||||
| Accordion folds |
Talk about the evidence
Ask: Which design held the most weights in your trial? Did every group get the same result? What stayed the same, and what changed? Where did the bridge bend first? How could you make a second test more reliable? Students should cite their table rather than say only that a design “looks stronger.” If teams disagree, compare their method and repeat one trial under the same conditions.
Teacher explanation
A flat sheet bends easily when a load pushes down across a gap. Folding changes the sheet’s cross-section and can make it resist bending in that direction. The folds also change how the load is carried toward the supports. This simple model does not reproduce a real bridge, and the outcome depends on how students make and load each design. Encourage the class to describe what they observed rather than claiming that one fold pattern is always strongest.
Assessment and extensions
For a quick exit ticket, ask each student to name the controlled gap, identify the shape that performed best in their own test and quote one result from the table. Older learners can graph the maximum supported weights, repeat each design three times and compare the range. Another lesson can keep the shape constant while comparing paper types, but change only that one variable. A writing extension asks students to describe one redesign using a claim, evidence and reasoning.
Adaptations and inclusion
Offer pre-folded examples, picture instructions, vocabulary cards and roles such as builder, measurer, loader and recorder. Students can point, draw or dictate their prediction before writing a paragraph. For younger classes, test only two designs and use larger weights. For a remote or low-material lesson, the teacher can demonstrate while students make predictions and analyze a shared data table. Invite different solutions and make clear that a lower count is useful evidence, not a personal failure.
Ready-to-use conclusion prompt
“Our strongest bridge in this trial was _____. It held _____ counters before _____. We think the shape mattered because _____. If we repeated the test, we would keep _____ the same and change _____.” The sentence frame helps students connect a result to a controlled comparison. Save the class table and redesign notes so groups can revisit their reasoning in the next engineering activity.
Related resource: See the Schoolizer teaching and learning platform for organising lessons, assignments and class activity.